


How to Customize QuickBooks Payroll Checks for Your Company?
Customizing your QuickBooks payroll checks is a smart move for any company. It helps you present a professional image, keeps your payroll information clear and accurate, and improves the experience for your employees.
Payroll checks are a vital part of any business. They ensure that your employees are paid appropriately and on schedule. If you use QuickBooks payroll checks to handle payments, customizing these checks can help your company maintain a professional appearance and meet specific payroll needs. Customizing your payroll checks is not just about adding your logo; its about tailoring the checks to fit your companys identity and simplify your payroll process.
This guide will walk you through how to customize QuickBooks payroll checks effectively, making your payroll system more efficient and your business look more polished.
Why Customize Your Payroll Checks?
Before diving into the how, its important to understand the benefits of customizing payroll checks:
Professionalism: A well-designed check with your company logo and clear details shows professionalism to employees and banks.
Brand Identity: Customization helps reinforce your brand by including your business name, logo, and contact information.
Accuracy: Adding specific fields can help reduce errors and ensure all necessary payroll information is included.
Compliance: Properly formatted checks help maintain compliance with banking and payroll regulations.
Convenience: Customizing allows you to include specific information your business needs, like direct deposit notes or tax details.
Step 1: Prepare Your QuickBooks payroll checks
Start by opening your QuickBooks software and navigating to the payroll section where you manage payroll checks. Its important to back up your company file before making changes, just in case you need to revert to the original settings.
Once youre ready, go to the Print Setup or Check Setup option. This area is where you control how your payroll checks look before printing.
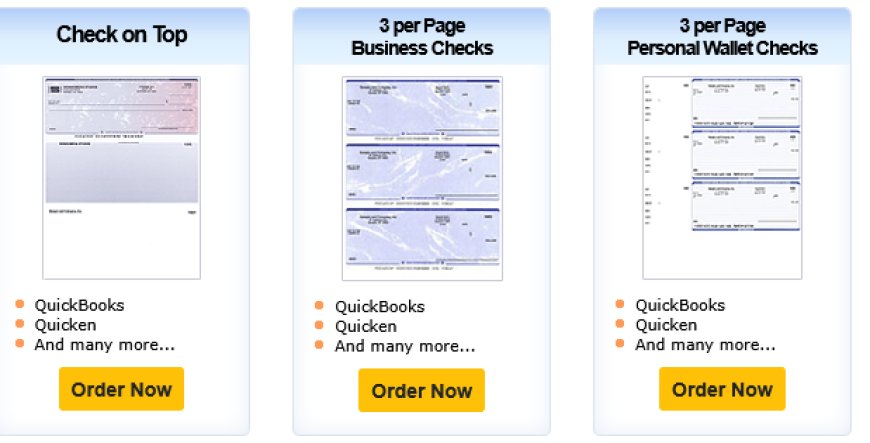
Step 2: Choose the Check Style
QuickBooks has various pre-designed check layouts, including voucher checks, normal checks, and wallet-sized checks. Choosing the right style depends on your printing preferences and the size of your checks.
Voucher Checks: These include a detachable pay stub with detailed payroll information. They are helpful for employees who want a record of deductions and earnings.
Standard Checks: Basic checks with essential payroll details. They are simpler and faster to print.
Wallet Checks: Smaller-sized checks that fit easily into wallets. Useful if your employees prefer carrying physical checks.
Selecting the correct style ensures that the checks meet your company's needs and employee preferences.
Step 3: Add Your Company Logo
One of the easiest ways to personalize your QuickBooks payroll checks is by adding your company logo. This small touch can make a big difference in the professional look of your checks.
To add your logo:
Locate the Add Logo option in the check customization menu.
Upload a high-quality picture file of your company logo. Its best to use a clear, simple image without too many colors.
Position the logo where it looks bestusually the top left or right corner of the check.
Make sure the logo does not interfere with any important information fields on the check. A well-placed logo adds credibility and reinforces your business brand.
Step 4: Customize Check Fields
QuickBooks payroll checks allow you to control which fields appear on the checks. Depending on your companys needs, you might want to add or remove certain details. Common fields include:
Employee name and address
Pay period dates
Earnings and deductions
Net pay amount
Company contact information
Check the number and date
You can also add custom messages or notes to the pay stub area. For example, you might want to include tax filing reminders or holiday greetings.
To customize fields:
Go to the Layout Designer or Check Layout section.
Click on the fields you want to add or remove.
Drag and drop to reposition fields for better readability.
Adjust font size and style to make sure everything fits well and is easy to read.
The goal is to create a check that provides all necessary information clearly, without overcrowding.
Step 5: Set Up Pay Stubs
Pay stubs attached to payroll checks provide employees with detailed information about their earnings, taxes, and deductions. You can customize the stub to include exactly what your employees need.
Consider including:
Year-to-date totals for earnings and taxes
Breakdown of deductions such as health insurance or retirement contributions
Leave balances or vacation accruals
Important company messages or updates
Customizing pay stubs not only helps employees understand their pay but also reduces payroll-related questions and confusion.
Step 6: Preview and Print Sample Checks
Before printing QuickBooks payroll checks payroll checks for your employees, always preview the customized check design. QuickBooks allows you to print sample checks, which you can use to check for errors or design issues.
Look out for:
Proper alignment of fields and logo
Correct spelling and formatting of company and employee information
Legibility of pay stub details
Adequate spacing and margins
Print a few samples on blank paper or pre-printed check stock to ensure everything looks good. Adjust your layout if necessary until you are satisfied.
Step 7: Save Your Customized Check Template
Once you finish customizing, save the template. QuickBooks allows you to save multiple check layouts, so if your company uses different formats for different payroll needs, you can switch easily.
Regularly update your template when company details change, such as address, phone number, or logo. Keeping your payroll checks current helps avoid confusion and delays.
Step 8: Printing Your Payroll Checks
When printing your QuickBooks payroll checks, use quality check stock paper designed for your chosen check type. This paper frequently incorporates security elements that prevent fraud.
Set your printer settings to match the check size and style. Test the alignment one last time with a blank sheet before printing on the actual check paper.
Make sure you have enough ink and your printer supports the paper thickness. Proper printing ensures that the checks are clear, professional, and easily processed by banks.
Additional Tips for Customizing QuickBooks Payroll Checks
Keep it Simple: Avoid overcrowding your checks with too much information. Stick to essential details for clarity.
Use Standard Fonts: Choose fonts that are easy to read and widely accepted by banks.
Security Features: If possible, add security elements like microprinting or watermarks to prevent check fraud.
Stay Updated: Keep up with payroll regulations to ensure your check formats meet legal requirements.
Employee Feedback: Ask employees if the pay stub provides enough detail and is easy to understand. Their feedback can improve the payroll process.
Conclusion
Customizing your QuickBooks payroll checks is a smart move for any company. It helps you present a professional image, keeps your payroll information clear and accurate, and improves the experience for your employees. From adding your company logo to designing pay stubs and choosing the right check style, every step contributes to a smoother payroll system.
By following this guide, you can create payroll checks that meet your business needs and support your brand. Take the time to review and update your check design regularly so your payroll remains efficient and reliable.